What To Do When Your Water Heater Is Leaking
A Comprehensive Homeowner’s Guide
8/21/20254 min read
Discovering a pool of water beneath your water heater can be alarming. Not only is it an inconvenience, but water leaks in your home can cause significant damage if left unaddressed. Fortunately, a leaking water heater doesn’t always mean disaster—and with a bit of systematic troubleshooting, you can often pinpoint the problem and even fix it yourself. In this detailed guide, we’ll walk you through the steps for identifying the source of a leak, distinguishing between repairable and unrepairable issues, and deciding when replacement is the best option.
Initial Steps: Safety First
As soon as you notice water under or around your water heater, follow these initial safety steps:
Turn Off the Gas Supply: For gas-powered water heaters, locate the gas control knob and set it to the “off” position. This helps prevent any accidents or hazards while you’re working on or near the appliance.
Assess the Severity: Is the water pouring out rapidly, or is it just a slow drip? If water is spraying or pouring out quickly, your priority should be to shut off the water supply to the heater immediately. For slow leaks, it’s often helpful to leave the water on temporarily to help identify where it’s coming from—but be cautious to minimize water damage.
Systematic Inspection: Where Do Water Heaters Leak?
Water heaters can spring leaks from several locations. Some leaks are relatively simple to fix, while others indicate a much more serious problem requiring a complete replacement. To effectively diagnose the issue, always start from the top and work your way down.
1. Start at the Top
Begin by examining the hot and cold water supply lines, also known as risers. These connect your home’s plumbing to the water heater. Leaks from these points usually look like dripping or pooling water near the top of the heater. Check:
Fittings: These are joints where pipes connect to the heater, and they can loosen or develop boiler scale over time.
Tank Nipples: These threaded connections may corrode, especially if exposed to hard water or age.
If you notice moisture or leakage from these upper connectors, the good news is these problems are generally repairable. Tighten any loose fittings, and if corrosion or severe wear is present, you may need to replace the affected parts.
2. Check the Tank Seams
If the external fittings are dry but you find water seeping from the top seam of the tank itself, this is a sign of an internal failure. For leaks at the top or bottom seam, the water heater will almost always require replacement. The actual tank inside the unit has likely rusted through, and no amount of tightening or sealing will resolve this.
3. Temperature and Pressure Relief (T&P) Valve
A frequent culprit for leaks is the temperature and pressure relief valve, designed to discharge water if the pressure or temperature inside the tank gets too high.
Check the Connection: Inspect where the T&P valve is threaded into the tank. If you see drips here, it could be a matter of loosening and resealing the threads with plumber’s tape or tightening the connection.
Inspect the Drip Tube: The end of the drip tube attached to the valve can sometimes leak, too. Make sure it’s dry and securely fitted.
Issues at either of these points are typically repairable.
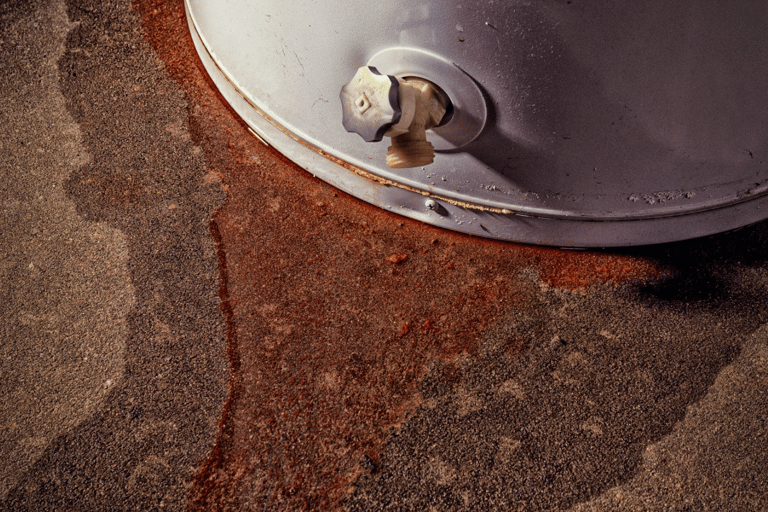
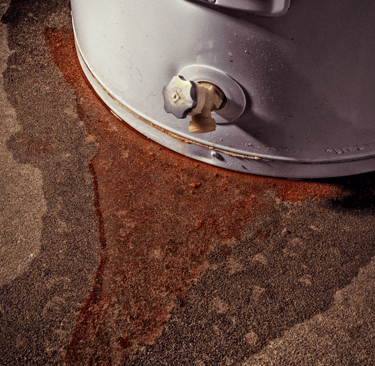
4. Gas Control Valve Leakage
Water occasionally appears around the gas control valve, which could indicate a faulty seal where the valve enters the tank. While leaks here are less common, check for moisture. Tightening the valve or replacing a worn gasket often resolves the issue.
5. Drain Valve
Your water heater includes a drain valve near the bottom, used to empty the unit for maintenance or replacement. If you notice water coming from the drain spout:
Tighten the Valve: Sometimes, a loose valve is to blame. Carefully snug it with a wrench; avoid overtightening, which could cause damage.
Check the Threaded Connection: If the leak persists, you may need to redo the connection or replace the drain valve altogether—an easy fix with basic plumbing skills.
6. Inspect the Bottom
Finally, if all the above points check out but you still see water emerging from the bottom seam of the tank, the internal tank has likely failed. Replacement is the only reliable option, as repairs to the actual tank body are impractical and temporary at best.
The Condensation Question
Sometimes, what appears to be a leak is actually condensation—especially if you’ve recently installed a new water heater or if yours is working overtime. Condensation collects on the exterior and may drip down to pool underneath. To determine if this is the case:
Dry the area thoroughly around the heater.
Wait 24 hours. If no water reappears, condensation was likely the cause, and there’s no leak to worry about.
If water returns, proceed with your investigation as described above.
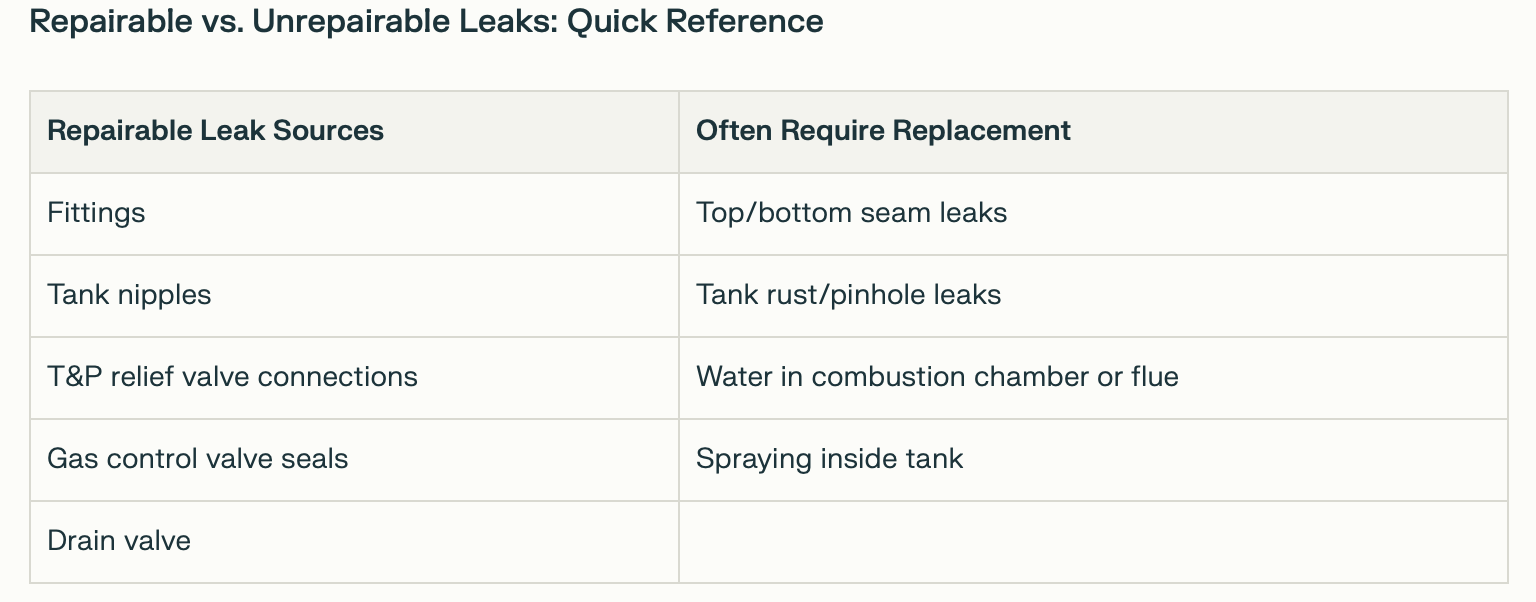
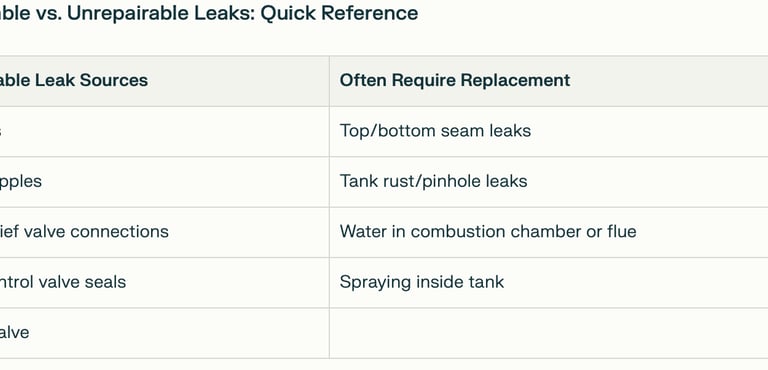
Repairable vs. Unrepairable Leaks: Quick Reference
Repairable Leak SourcesOften Require ReplacementFittingsTop/bottom seam leaksTank nipplesTank rust/pinhole leaksT&P relief valve connectionsWater in combustion chamber or flueGas control valve sealsSpraying inside tankDrain valve
When Replacement Is the Best Option
If you determine the tank itself is leaking—from either the top or bottom seam, or if you observe spray inside the flue or combustion chamber—the only lasting solution is water heater replacement. Continued use of a compromised tank is risky and can lead to catastrophic failure or even flooding.
Next Steps and Additional Resources
Once you’ve identified the source and nature of your water heater leak:
Perform quick repairs for simple issues (tightening fittings, replacing valves).
Contact a professional if you’re uncertain or encounter a tank failure.
Consult local codes before starting any work—sometimes permits or inspections are required for plumbing jobs.
For DIYers interested in learning more, video tutorials and guides are invaluable. The Pros DIY water heater playlist features step-by-step videos for repairs, replacements, and troubleshooting specific water heater problems
Final Thoughts
A leaking water heater is something every homeowner dreads, but with a systematic approach, you can often prevent extensive water damage and save money. Pinpoint the source, evaluate whether a repair or replacement is needed, and don’t hesitate to seek professional help for major failures. Remember, prompt action helps protect both your home and your peace of mind.
dpcustomsny@gmail.com
585-820-7022
© 2025. All rights reserved.